
 The quality of movie images on DVD is made up of two things: the first is the film’s original quality and the second is the process used to transfer the film to digital DVD. Because there are so many different methods of transferring film to DVD there is a huge range in quality and cost. So lets talk about some of these options and how to understand what you can expect when transferring your home movies to DVD.
If you look at where images look their best on DVD, you might think of your favorite blockbuster motion picture you have purchased on DVD to watch at home. You may have noticed that there is significant difference in how these DVD’s look vs. the majority of home movie DVD’s. While your home movies might not rival a Hollywood production, could your home movies look this good? Definitely! But in order for that to be achieved it has to be done with similar methodologies.
Film Chain Transfer
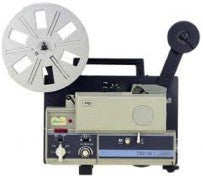
The way Hollywood movies are transferred to digital has evolved tremendously over the past 50 years. In the 1960’s Hollywood movies used film projectors and video cameras to transfer movies to video. This process called a Film Chain Transfer did the job economically and considering the size of the TV set and broadcasting at the time this method was more then adequate. However, there were some problems in this system. Because projectors use a claw to advance the film and a shutter to create continuous motion for viewing, it resulted in a flicker that you often see in your home movies. There was also no way to make adjustments to color and contrast to improve the look of the film because the projector had to run continuously and could not be interrupted to make any improvements.
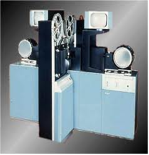
Flying Spot Scanner
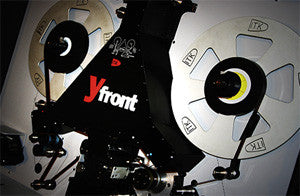
By the late 1970’s, Hollywood productions began shifting away from the film chain method and started using new technology called a Flying Spot Scanner. These industrial machines had no shutters so they could deliver a flicker less image. They also had no claw and were driven by a capstan, which allowed for precise control over the film. With the precision of a sprocket less drive, you could rapidly shuttle the film back and forth and stop on a frame without damaging the film. They used the technology of a computer to program adjustments during the transfer.
Scene to Scene Color Corrected
With the flying spot scanner also came programs for color correction, scene-to-scene color correction to be exact. Color correction is an amazing tool because it allows the person doing the film transfer to fine-tune each scene before recording it to DVD, which is usually critical because most often there are inconsistencies in color and exposure that happen in the camera or processing of the film. Also, seeing a projected imaged and seeing a televised image often looks different because of the display. By correcting the picture digitally you can get a much more accurate match in terms of contrast and color.
One-Light Transfer
With all these improvements such as the Flying Spot Scanner and color correction the Film Chain system quickly became obsolete in Hollywood. But in the 1980’s the industry began to change again as more parts of the motion picture business were progressing digitally. Tape decks became digital, editing machines became computers, the scanners became digital and so on. In 1994 we saw the introduction of the DVD player; the first way for a consumers to play a digital moving image.

Interlaced Image
Digitizing everything has had great advantages and in general has made for much higher quality processes. But all digitizing isn’t created equal, and HOW an image is digitized and from what source can make a tremendous difference in the quality.
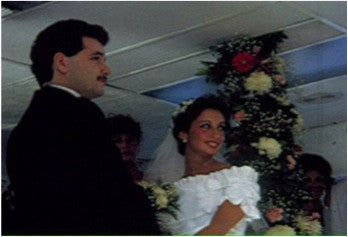
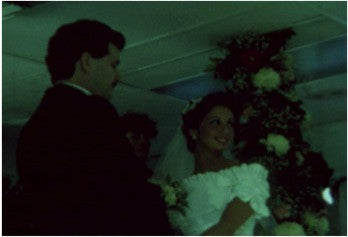
In the 90’s (and even today) the majority of consumer home movie transfers were recorded interlaced and then transferred to DVD (resulting in an image like you see on the right). Interlaced recording isn’t always obvious, especially when it is being watched on a tube TV. But as society has been using more and more digital devices the interlacing has become more obvious when viewed on certain digital devices.

Non-interlaced Image
In the late 1990‘s the evolution to Higher Definition recording was introduced, which involved even more resolution for film to digital transfers. It also introduced frame for frame (non-interlaced) recording. When film is recorded digitally frame for frame you don’t have the issues of interlaced artifacts because 1 frame of film equals 1 frame of digital. And it is because of frame for frame recording that the evolution of DVD recording started to look much better for consumers. Even before High Definition, the Hollywood system made DVD’s from frame for frame recordings, which explains why your favorite Blockbuster DVD’s look so much better!
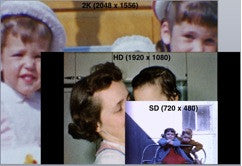
SD (720 x 480), HD (1920×1080), 2K (2048 x 1556)
Believe it our not, HD (High Definition) is already being surpassed by an even higher resolution called 2K. This method is sometimes referred to as Data Scanning. A 2K Data Scan use a 2048 X 1556 digital image size. While this may be a bit much for your home movie DVD’s, you should be aware that it exists because data scanning generated from 2K files may be more prominent in the future.
So now that you know about the evolution of film to digital transfers lets back up and discuss how this relates to your home movies and how they are transferred today.
Film Chain System
The first method you will often come across is what the Hollywood people did 40 years ago, and that is a film chain transfer (using an old projector and a video camera to transfer film to digital DVD). This does not produce a very high quality image. It often looks dirty and contains a flicker. If you have watched your 8mm film projected you will immediately notice the quality loss you now have on DVD. One deceiving fact is that that this process can be done with any video camera. For example if using a hi-def video camera some may call it a “High Definition” transfer but the quality is limited because of the method. Unfortunately the majority of services that do 8mm to DVD work still use this method.
Flying Spot SD scanner
The second method you may come across is interlaced flying spot scanning, typically a basic Standard Definition scan. While this method can also be done in high definition you would really only want to use this method in Standard Definition because in HD there are better options (which we will discuss in the next paragraph.) The flying spot scanner offers a lot more quality than a film chain transfer. If you are not showing your 8mm on any large TV screens the images should be more than acceptable. To save on cost you may skip having it scene-to-scene color corrected, but it is an option. Keep in mind if you are watching your SD DVD on a really new TV or computer the interlacing could be apparent at times, but this is still a fantastic and economical way to get your home movies transferred in a safe way that renders good quality to DVD.
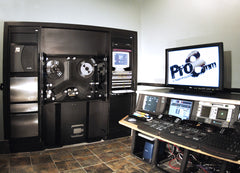
Flying Spot HD / 2K Scanner
If you decide to take your home movies all the way to the a highest quality you would want to have them scanned using a Flying Spot Scanner in professional High Definition 24P (progressive) frame for frame. In order to achieve high quality HD it has to be scanned 24P Frame for Frame (not interlaced). The frame for frame part is critical because your digital will be a true reflection of your film. It will also produce the best quality images on your digital devices. If you add in the Hollywood touches by having those images scene-to-scene color and exposure corrected, your film will not only match your originals but exceed them because they will be perfectly adjusted for color and contrast on digital. Now make a DVD from this methodology and you will see superior results. Because frame for frame HD 24p has eliminated the interlacing process it is much easier and cost efficient for the average person to get a Hollywood quality DVD.
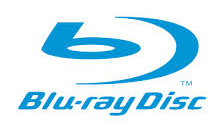
Blu-Ray Disc
And what about Blu-Ray? Blu-Ray is an HD format version of DVD, so if you transfer your film in HD you may consider going to a Blu-Ray disc instead of a regular DVD. But keep in mind the quality is in the method, not the medium. A Blu-Ray of a film chain transfer created with an “HD” Camera is not going to look much better than a DVD scanned the same way because a film chain transfer just doesn’t render that type of quality.
Digital Masters on a Hard Drive
One tip I would like to mention is that if you do go to the expense of having a frame for frame digital master created to DVD, I would suggest you ask to keep the original Master Digital files. Any high quality transfer process will require the creation of a Digital Master before creating your DVD. Hold onto your Digital Masters because it is a high-quality playback and back up of the original film. Also, if you ever want to do something more with your Home Movies like edit them or say your home movies contain valuable historic material that could get used in a documentary, these masters will contain all the information needed to use these images in other applications. In fact, movies that you see in the theatre today like the Academy Award Winning film “ Argo “ have some scenes shot on new 8mm film and those images came from a Digital Master. So keep them because you never know when you might get the chance to use them.
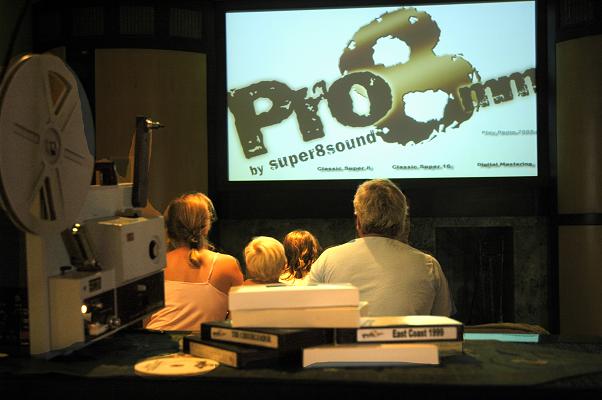
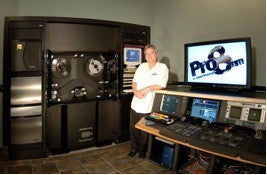
 So, how much do these “high quality” versions cost? At Pro8mm we charge $1 per foot to get a frame for frame HD
![]() digital master of your film in 24P. This includes prepping and cleaning the film onto archival safe reels and using a state of the art flying spot scanner that has dirt and scratch concealment technology and scene to scene color and exposure correction. In fact, it is done on the same machine that is used to transfer Hollywood movies. Cut that price in half to $0.50 cents per foot for the Standard Definition option. If your job is over 1200 feet of film and you supply us with a hard drive you can keep both the digital master and the DVD set, giving you the most out of your home movie legacy transfer.
digital master of your film in 24P. This includes prepping and cleaning the film onto archival safe reels and using a state of the art flying spot scanner that has dirt and scratch concealment technology and scene to scene color and exposure correction. In fact, it is done on the same machine that is used to transfer Hollywood movies. Cut that price in half to $0.50 cents per foot for the Standard Definition option. If your job is over 1200 feet of film and you supply us with a hard drive you can keep both the digital master and the DVD set, giving you the most out of your home movie legacy transfer.
© Pro8mm | 2805 West Magnolia Blvd, Burbank, CA 91505 | info@pro8mm.com | www.pro8mm.com
For more information and questions, please contact: info@pro8mm.com or call us at 818-848-5522
The post How to Get the Best Quality DVD’s of your 8mm Film appeared first on Pro8mm.